Virtual Backgrounds
With LessonPix, PowerPoint (or Google Slides), and Zoom
Making custom virtual backgrounds is a great way to include visual supports in your remote learning. This article uses PowerPoint to create a background custom to your needs. (Here is a starting template for PowerPoint to get you started.)
1. Save PowerPoint or Google Slides as PNG
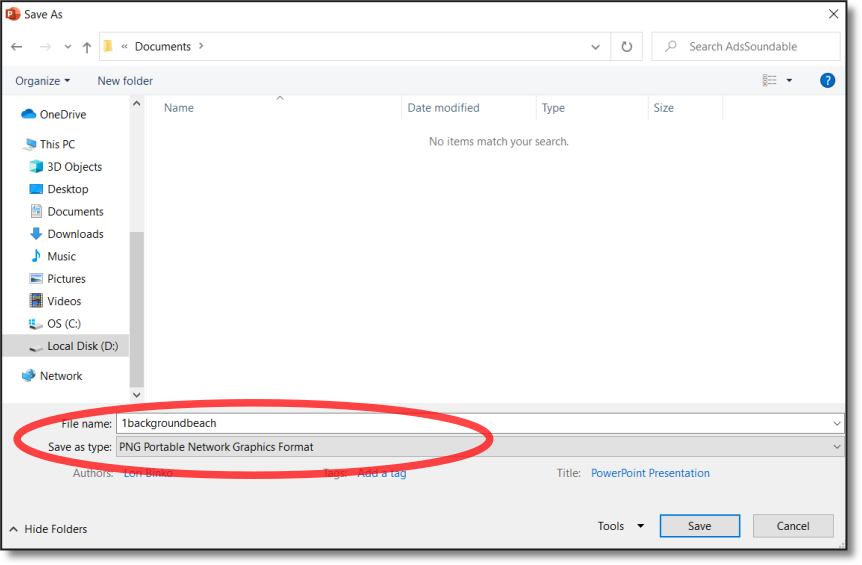
First thing to know is that the virtual background uses an image file. It can be a photo (jpg), clip art, or PNG. In PowerPoint, create your background and then "Save As" a PNG.
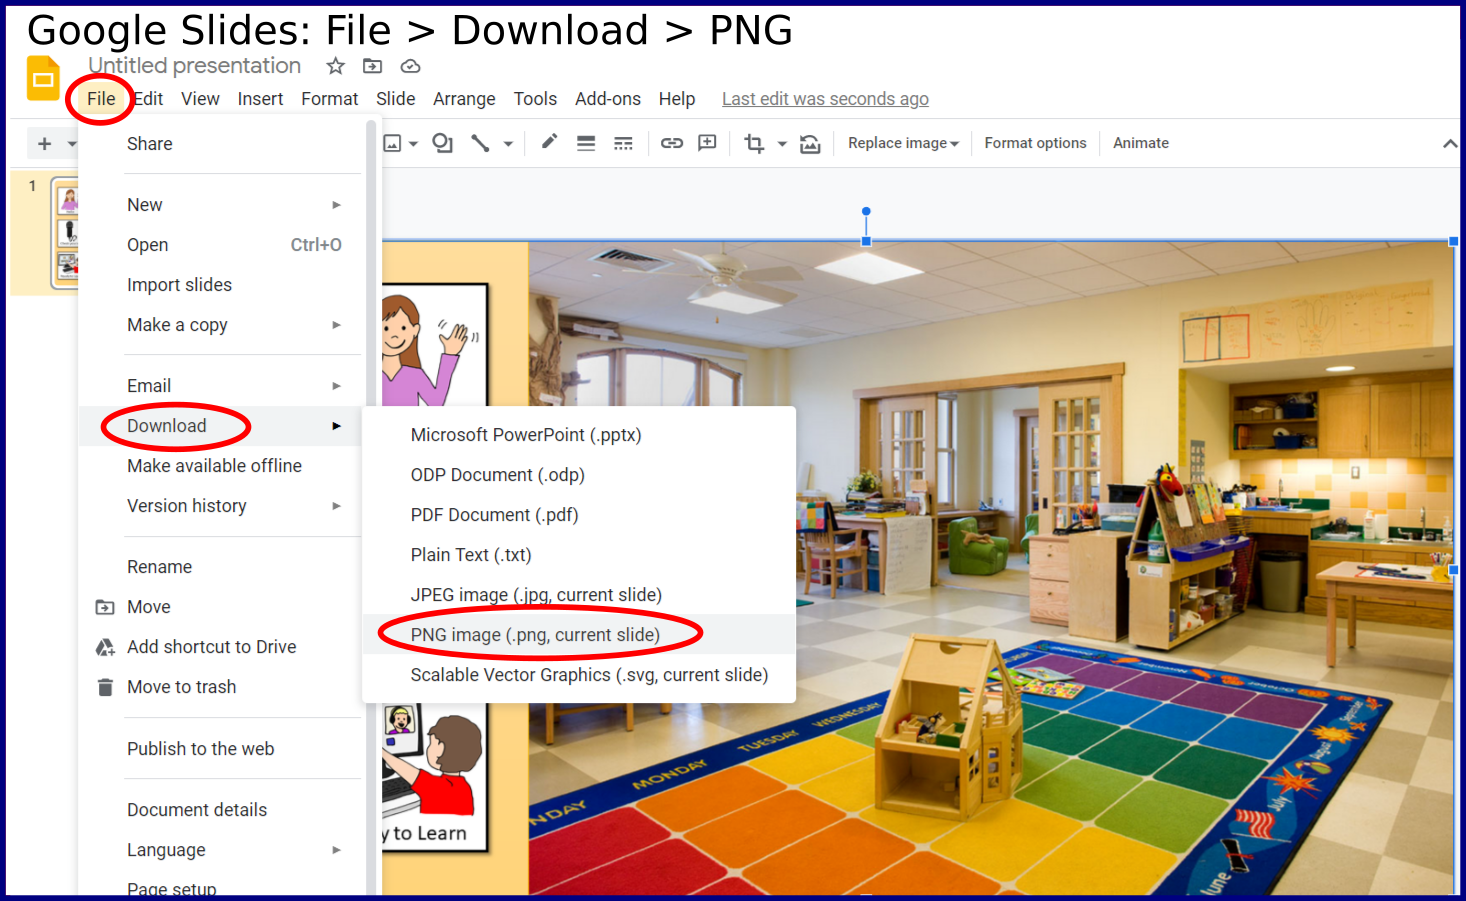
In Google Slides, go to File and download as a PNG.
2. Creating Your Virtual Background 
Whether you use PowerPoint or Slides, you can create a virtual background to enhance your remote teaching practice with visuals. Remember to consider your audience: less stimulation to help focus or more imagery to increase engagement and language. (Often you may choose a balance of the two.) Add visuals to support rules, expectations, target vocabulary, themes, or learning objectives. Here are 3 ways to use virual background in yyour remote teaching practice.
A. Visual Cues Sidebar:
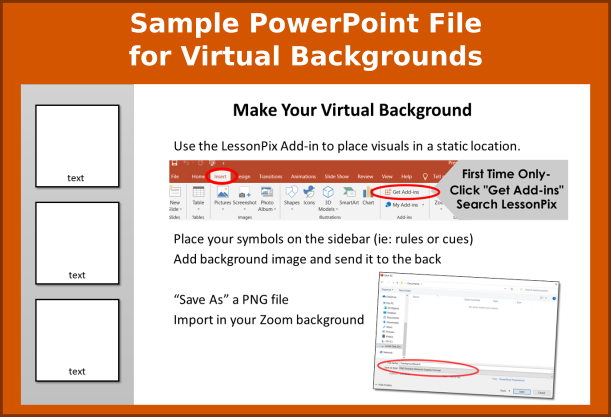
On a blank document, I insert shapes and text boxes to plan where my visuals will go. Here is a PowerPoint starting template for your virtual backgrounds. Then I use the LessonPix Add-in to add the symbols.
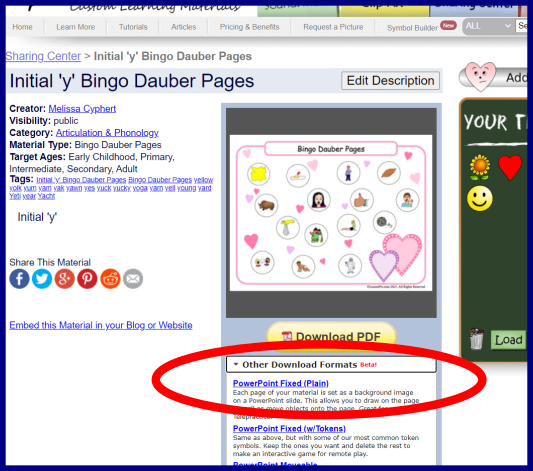
B. LessonPix Template
Try using a Lessonpix Template as a background. This works well with horizontal templates. Use picture cards, visual schedules, Bingo dauber, I am working for, or sorting mats, just to name a few. When you create a materials, you can open the material as a PowerPoint file. Then save the image as a PNG.
C. Green Screen Object
Another idea is to green screen your background. Using any solid color object, you can use the green screen effect to emphasize items on your virtual background. Check out this video to see how it works:
Have fun teaching and learning together!
 Facebook
 Twitter
 Pinterest